Maybe you’re doing it for the thrill of performing. Maybe you’re trying to document your progress. Maybe you want to create a killer portfolio. Or maybe you want to shoot for the stars and become the next big influencer.
Whatever the reason, you’ve come to the right place – here’s a guide on how to film and record your own drum covers!
One thing that most people often forget is to clean the space that’s going to be visible in your shots. I’ve been guilty of that. I’ve sent a video out where you can see a mop and a bucket on the foot cam. Whoops!
Jokes aside, the presentation goes a great length to the overall feel and vibe of the video. Tidying up the room will give you an air of professionalism, that you’re serious about your craft and attention to detail. Of course, you might be aiming for a different vibe – where showing off a messy drum space is what you want.
Let’s be honest – most of us aren’t going to move our entire drum kit outside just to get great natural lighting for our videos.
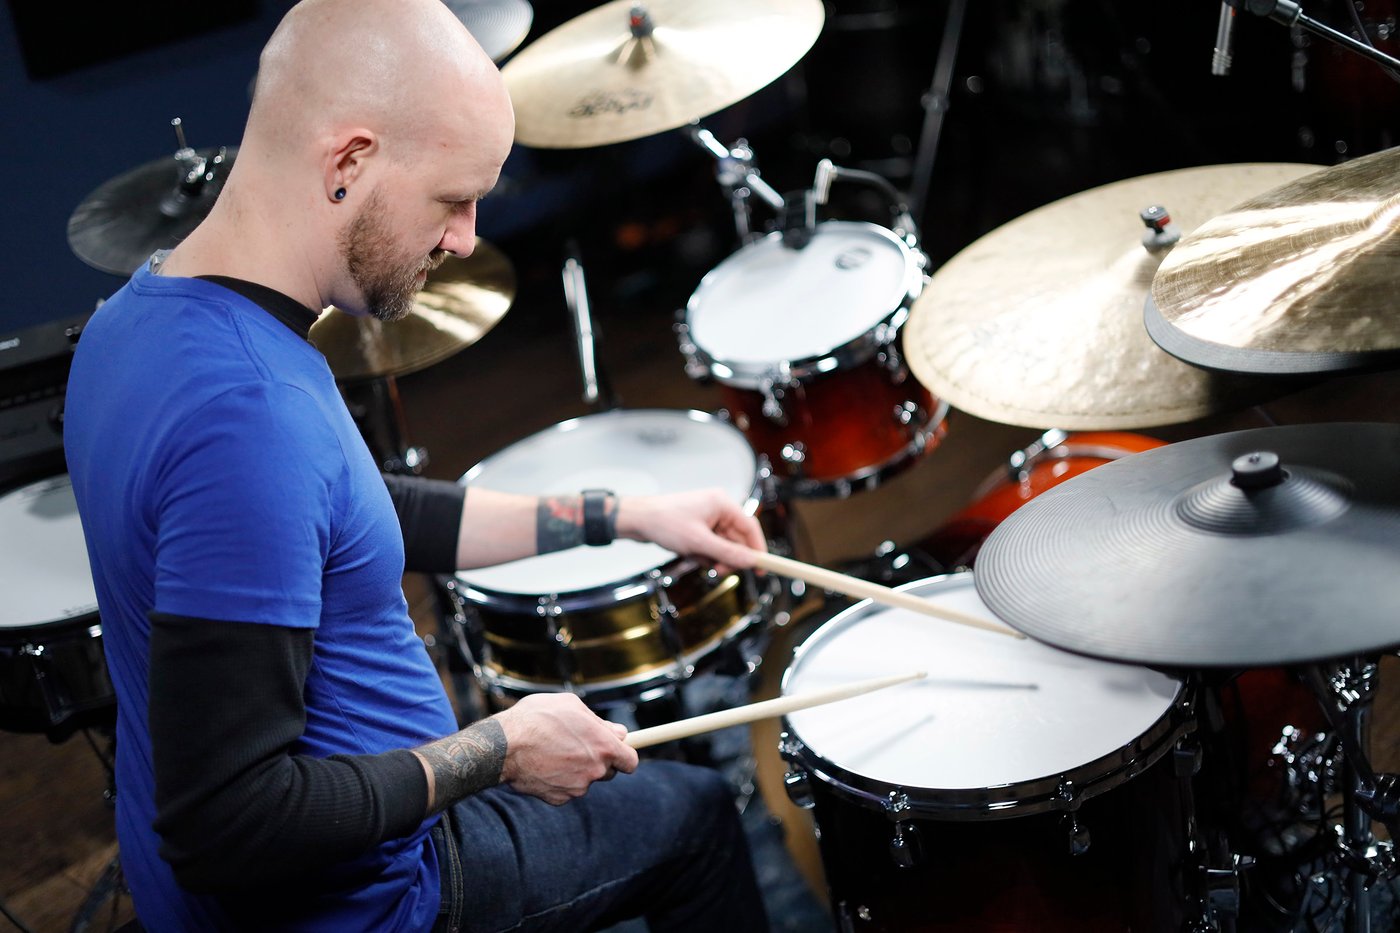
One essential factor for video quality is adequate lighting. The more light you have, the better your video will look. But one ring light in front of your kit won’t likely be enough. Drumeo uses five or six big light panels, all aimed at the artist.
You can get a semi-pro setup quite cheap these days. We could go on and discuss white balancing issues, whether a cooler light (color profile of 5600k) might be better for your shot, or whether you should go with something warmer (lights with a color profile below 3200k), but start by investing in a couple of lights to make sure you can cover any undesirable shadows.
You’ll at least want a key light (a focused light that lets you control exactly where shadows appear or disappear) and a fill light (that can provide general light around you). In a three-point lighting setup, you have a key light, a fill light, and a backlight (something you should definitely have if you’re playing in front of a dark background).


If you’re just starting out – or you’re new to using lights – Neewer makes a range of cheap but reliable products ranging from $40 to $400 that will cover most if not all of your lighting needs for any size room. You can get them on Amazon!
If you can’t afford a brand new specialized lighting setup, you can make do with what you have at home – it just won’t be as epic looking. Using the same principles of fill and key light, grab a few floor lamps (diffusing them with a sheet of paper if they’re too bright and harsh) and place them around the kit. Even flashlights and phone lights can help!

What should you be looking for when setting up for a shot?
Firstly, make sure there’s enough light so your face doesn’t have noticeable shadow zones. Place the key light – your primary light – in front of the drum kit at a 45-degree angle from the camera.
Secondly, make sure people can clearly see your hands, sticks, and any surfaces you’re playing on. If you want to get more artistic and dive a bit deeper, have a look at broad versus flat light, loop light, back light, butterfly light, and a few other interesting lighting techniques.
Are you thinking about adding a shot of your feet? Be aware that keeping a foot cam well lit is a common issue. Those shots are often riddled with shadows from the drum kit and the drummer. Sometimes adding light to this shot can create even more problems with shadows, so experiment with light placement for your foot camera before you hit record.
Ah, that famous question. How do I remove the drums on this commercially recorded song?
If you’re going to be doing a cover where you play the drum parts exactly the same, note for note, the need to remove the original drums will be less of an issue for you as you can mask the original drums. But if you’re going to be taking creative liberties, your drum sound clashing and flamming against the original drum sounds is not going to provide a very good listening experience
Depending on the music genre, you might be able to get rid of the drums completely, but most of the time it will come at a cost to the rest of the track. In many situations, it will be nearly impossible to do any drum removal without severely impacting the sound of the song.
This is because drums as an instrument are fairly broad in the frequency spectrum, and usually panned to take the entirety of the stereo field. But with some engineering knowledge and experience, you can use a combination of M/S, EQ, Compression and Phase techniques to attenuate or remove drums from a track.
If that sounds daunting to you, here are a few other alternatives:
Check out this article with more resources on finding and using drumless play-along tracks.
Using a portable recording device
You might have seen quite a few people using those little Zoom devices. I love these recorders. They are reasonably cheap and can record audio in mono, stereo and other configurations, as well as video. They are reliable, well built, and sound good.
The Zoom Q4N is one of the best cameras for making drum videos on a budget. It has a 4K wide-angle lens camera – making it perfect for small spaces and large drum kits – and a stereo microphone capable of handling 120dB SPL (that means really loud drumming). It’s the perfect recorder device to place above the kit, next to the drummer, or in front of the kit.
If this is not enough, it also offers a line/external microphone input. You could have all your microphones or your electronic drum kit output going to a mixer alongside the playback of the song, and have the entire cover done in one step without the need for post-production.

Alternatively, you can always sync the audio to the song in post-production.
The other Zoom device I’d like to mention is the H2N. It comes with several capture modes (XY, Mid/Side, and even some interesting surround modes) and microphones capable of handling 120dB SPL. If you have a camera available, or you have a smartphone with a decent camera but need to upgrade the sound, this is definitely one of the best contenders on the market to do the job.

Using your smartphone
There’s a good chance you’re reading this on the same device you can use to record yourself. The latest generations of iPhones have excellent built-in microphones and processing that can capture audio quite well, including loud sources such as your drum kit. Smartphone cameras are stellar and have been used in countless drum covers, documentaries, and even award-winning feature movies.
There are two major downsides to making videos with your phone, in my opinion:
Most people like adding multiple shots to their videos to make it more exciting for the viewer. Because the above setup requires some post-production tasks, moving from one camera (your iPhone) to multiple cameras is simpler than it seems.
A benefit of shooting with your phone is how easy and flexible it is to expand your setup:
If you’re using multiple phones and/or cameras, I strongly recommend you still record with the audio on every camera as it will make syncing the devices much easier in post-production (even though you’ll likely discard the audio).
You should also get in the habit of slating, which will help you line up the audio and save you a lot of time later. Say the production name and take number out loud, then clap.
Takeaways for a multiple camera setup: Always record audio from each device as it will make it easier to sync in the future. Whenever possible, slate the take number and add a short sound before you start each take. Lastly, create a template for color correction in your editor for each camera used, as it will save you time during post-production.
Recording with mics and an interface
If you’ve never gone the traditional recording route before, the idea of setting up separate mics, routing them through an interface, and connecting it all to your DAW software might sound overwhelming. While you could go down the rabbit hole when it comes to mics, recording, editing and mixing, it isn’t as scary as it sounds.
To get started, you’ll need some drum mics and XLR cables, an interface (like a Focusrite Scarlett 18i8 or 18i20 or a PreSonus Studio 192), and a DAW (like ProTools, Cubase, or Reaper). You’ll also need to know how to place your mics, how to set up a session on your computer, how to test your mic outputs and levels, and how to edit, mix, and export.
There’s a lot to know. For a complete beginner’s tutorial on recording drums the way studios do it, check out a helpful guide here.
Using the Yamaha EAD10
Yamaha truly changed the game when it comes to recording an acoustic drum kit quickly and cheaply. This unit and an iPhone might be all you need to record your covers!
It might seem a bit on the pricey side (about $500 at the time of writing) but it removes the steep learning curve needed to achieve the same results.
With this module, you don’t need to learn audio mixing techniques, multiple microphone techniques, signal flow, or how to trigger samples. You don’t need to learn how to sync audio and video, or create tempo maps for your click tracks. It will also save you money on microphones, preamps, converters, microphone stands, cables, DAW software licenses…you get the picture.
At its heart, the EAD10 uses a microphone (although you can expand the system by adding triggers) and a brain similar to the ones found in electronic drum kits. It will capture your entire drum kit and use samples to reinforce and process the sound. You can then swap between hundreds of mixes and styles at the push of a button – no extra tuning or changing parts required.
Here comes the best part: you can load in songs and play alongside them – and record – all in one go. The EAD10 brain even comes with handy tools like a smart metronome that will add a pulse to the track.
Here’s one last killer feature for your drum cover needs: if you have an iPhone, you can connect it to the EAD10. Set up the phone on a tripod and start recording.
Now you have a drum cover recorded with a high-quality iPhone camera and a decent audio mix of your drums, ready to be uploaded to YouTube or social media.
If you want to up your production value with more cameras, you can have the extra cameras rolling, import all the footage to a video editor like Final Cut Pro X, and edit away scene transitions to your heart’s content.
Using an electronic drum kit
If you have an electronic drum kit, you should be able to connect it to a computer and record directly into your software. There are a few ways to set up a DAW to receive internal samples or MIDI notes (which you can then sample replace), and there are a ton of resources on YouTube.
The nice thing about recording with MIDI is that it’s easy to manually move a note if you make a mistake. But don’t rely on it – drum videos should still show your real ability and your human side! Practice playing accurately rather than quantizing (perfectly aligning each note to the grid post-recording).
Using action cameras
Decent cameras can be very expensive – especially if you need more than one. They also typically have telescopic lenses and most of us have fairly small practice/performance spaces.
That’s why you should try a GoPro Hero, a Sony FDR X1000, or a Sony FDR X3000 action camera if you want a multi-cam setup.
Action cameras are usually cheaper than their counterparts but have been able to handle fast motions, low lighting and 4K footage for a while now. They can also be found rather easily on second-hand websites.
The other reason I recommend action cameras is that they generally have wide-angle lenses, which give you more flexibility with your shots if you have a large kit in a small room. It comes at the expense of some distortion in the image, but Drumeo used to use the Sony FDR X1000 extensively (they now use the Sony RX0 II) and you can see the GoPro Hero in Aaron Edgar’s remote lesson videos.
Using traditional cameras
It goes without saying, but modern DSLRs take fantastic video – including high res 4K! If you already have one of these cameras, or you’re prepared to invest a few thousand dollars into one, they’ll take your drum covers to the next level.
There are a ton of online resources that outline ISO (your camera’s sensitivity to light), aperture (which controls the amount of light allowed to enter the camera), and shutter speed. But here’s a basic overview:
To control each of these variables independently, you should use your camera in manual mode. It’ll give you the best results, which is probably what you want considering how much you’ve invested into this type of camera. If you don’t know how to use yours manually, hit up YouTube!
The best camera settings for drum videos
As a drummer, keep the following in mind:
Get the best shots
You can have the best gear in the world, but without good angles, your video won’t be as enjoyable to watch.

Here are a few tips to keep in mind:


If you don’t have someone around to film you, you’ll need to do it all yourself. Plan extra time to get set up, since you may have to do more test shots as you adjust and optimize your lights and your camera settings.
If you’re using different cameras (or a combination of cameras and phones), make sure the frame rates match in every device, or make sure you convert the video before importing to your video editor of choice. Otherwise, the different angles will slowly drift out of sync with each other (and with the audio!).
Before you sit down, you can also set up a placeholder (a random item, maybe) on your throne while you focus your camera and adjust the height of your tripod. Then hit record, film yourself playing something, and review the test footage to make sure you’re happy with it.
You could export the final video from the EAD10 or use your phone to do some quick edits. But in most situations, you’ll want to export the media to a computer and use editing software to mix the recorded audio against the cover track.
If you captured audio using multiple microphones and an interface, or you recorded using an electronic kit, you use a DAW to edit, mix, process, and get a nice solid drum sound that fits the style of music you’re covering.

Rather than go into the entire process here, there are a few articles on The Drumeo Beat that cover editing and mixing, including the beginner’s guide to recording drums and this guide to drum samples (which teaches you how to use samples to improve your drum recording). Check them out if you’re new to recording or are interested in learning new techniques.
Once you’ve mixed the audio, you can import everything into a video editor and finalize the post-production steps.
If you want to shorten clips, edit between cameras, or add some filler footage to your videos, you’ll need some kind of video editing software.
If you’re a Mac user, iMovie is probably all you need. It handles multiple video lanes and multiple audio lanes, and even offers some color correction tools. Final Cut Pro is a good upgrade from iMovie, offering more intelligent tools for color correction, audio synchronization, and multi-camera editing.
Alternatives include Adobe Premiere Pro, Hit Film, and DaVinci Resolve.
Use one lane per video and your final audio mix (or the file you pulled from your EAD10 or Zoom Recorder). If you’re capturing audio from your phone or camera, make sure all cameras are muted except for the one you want the sound to originate from.
With this setup, you can now edit transitions between different shots, do PIP (Picture-In-Picture) composite shots, add text or logos, make color corrections, and more.

Some social media platforms are optimized to display specific ratios, resolutions, or lengths of videos. Bear that in mind when exporting the video.
Most mainstream video editors will have presets to export in the correct resolution and file format for most platforms. While – with some work – you can make a one-size-fits-all file, you may need to make some tweaks to prevent your shots from being cropped or your upload failing due to length/resolution constraints by the platform.
Here are some common specs to keep in mind for all social media platforms:
These are the aspect ratios for the most popular platforms (the resolution will change depending on your file):
I hope this article has enough information to get you started with your covers and playthroughs. Happy drumming!
Color Correction: A video post-production process that looks at the color profile of two different video feeds and applies correction curves so that both look and feel like they belong together. This is especially necessary if you shoot with different cameras, or if you shoot at different times of the day (when using natural light).
DAW: Digital Audio Workstation. It’s a piece of software that allows you to record one or more audio sources into separate tracks on your hard drive, and then edit them, mix it and bounce the final product into a stereo file. Popular choices are ProTools, Cubase, Logic Pro X, and Reaper, among many others.
DOF: Depth of Field. A term used in photography to describe how much a subject stands out against the background. This is achieved by blurring the background, and using the bokeh effect.
dB SPL: A decibel scale based on the sound pressure level. It’s a scale that allows us to indicate how loud a sound is, comparable to a unit of reference (Pascal). Acoustic drum kits usually sit between 80dB and 110dB SPL, depending on who’s playing, how well the kit is tuned, and the room it’s been played in. It’s not uncommon for a well-tuned kit, in the hands of a heavy hitting drummer, in a very small room, to reach SPL levels above 120dB.
Frequency Spectrum: The range of frequencies that humans can hear, which goes from 20Hz to 20,000Hz (20kHz). The lower the number in Hertz, the more bass or low pitched the sound is. The higher the number, the more treble or high pitched the sound is.
Mid/Side: An encoding technique where a stereo signal is separated into sides and middle, rather than left and right. This allows an engineer to process the sides of the center portion of a stereo signal individually. You’ll often need an “encoder matrix” to turn a stereo signal into M/S or vice versa.
PIP or Picture-In-Picture shots: When you have a smaller video superimposed on top of your main video. You might see this in drumming videos where you have a wide-angle shot of a drummer playing, with a small close up shot of the drummer’s feet in the corner of the video.
Slating: A term used in the film industry. By slating every shot, the film editor knows what take and scene that piece of film belongs to, and makes it easier to sync multiple cameras and audio to the audible clap signal. Traditionally, this was performed with a clapboard made out of slate – one of the assistants would write all the information with chalk, repeat the same information out loud for the audio recorders, and let the clapboard sticks fall for an audible click that could be easily synced to a frame.
Stem: A stem is a stereo audio file that includes a sub-mix of the whole track. The term became popular in the post-production circuits, where mixers and sound designers would mix chunks of the audio into a discrete stereo or multi-channel file for easier mixing workflows in large projects. In the audio world, stems are used to quickly remix or change songs and videos: for instance, a song may require a “no vocal” version, or a trailer may require the music or dialogue to be replaced.
Wide-Angle Lens: A lens that allows very wide shots to be captured, at the expense of some “barrel distortion”. Common lenses used for portraits (eg. 50mm) and landscapes (eg. 20mm) need to be a few feet away from the subject, and even then only a narrow-angle of view will make it into the shot. Wide-angle lenses allow you to fit much more into the shot. However, there will be some distortion (like some straight lines appearing slightly curved).
*This article contains affiliate links, which means we might earn a small commission from the product seller if you make a purchase. For more info, check out our privacy page.
João Lebre is a freelance mixing engineer at caffeinatedaudio.co.uk and drummer based out of London, UK. He has toured as drummer and FOH engineer, designed and commissioned world class studio installations, and lectured a range of audio engineering topics for SAE London. João is a passionate music instructor and is truly obsessed with gear.
By signing up you’ll also receive our ongoing free lessons and special offers. Don’t worry, we value your privacy and you can unsubscribe at any time.
/marketing/drumeo/promos/july/Primary.svg)