This is the ultimate guide for choosing in-ear monitors. Learn how to protect your ears and hear your fellow musicians clearly!
*Note: ‘Drum fills’ in this article refer to drum monitors. Check out the glossary at the end for more definitions.
I’ve been seeing a lot of questions about this on Drumeo and other online forums, so I decided to compile everything I know about in-ears from my experience.
Why should you trust a stranger giving his opinion on the internet? Fair question! For what it’s worth, here’s a bit about me: I started playing live shows in the late ’90s at a time when you would mainly use wedges for monitoring on stage, along with drum fills and side fills for larger stages.
In the early ‘00s, I started experimenting with personal in-ear monitoring systems (IEMs, or in-ears for short) both live and in the studio, as they were becoming increasingly popular even in the AA professional circuit.
By 2004 I was gigging with in-ears pretty much all the time. I spent my summer holidays between 2004 and 2007 touring full time either as a FOH mixer, monitor mixer (for bands with in-ears only) or as a drummer for pop-rock bands and a progressive rock tribute band.
After getting my degree in Recording Arts, I worked as head technical supervisor for SAE London and was a regular guest lecturer for the undergrad programs. I used to teach topics such as Live Sound (until the digital revolution happened), large format analog consoles, analog gear maintenance, advanced mixing techniques, and advanced post-production mixing workflows.
As far as in-ears go, I’ve made quite a few mistakes which have cost me some degree of ear damage, and a lot of money. Eventually, I learned enough to start making better decisions when it came to IEMs and I have managed to not only keep my ears healthy but also save a lot of money over a number of years.
Alright, there’s a lot of ground to cover, so let’s jump into it. I recommend that you get a coffee, a tea, or another beverage of your choice and let’s get started.

In-ear monitors are devices that go inside your ears like earplugs, and allow you to hear a personal audio mix. They provide performers and crew a nice amount of ear protection while solving a variety of technical issues and providing a really clear monitoring solution.
I love how, with a good cue mix, you can feel like you are playing along with a brilliantly mixed album and hear everything and everyone. The level of freedom you get comping/improvising with your colleagues on stage when the sound is clear and balanced is unparalleled to me.
Even if your gig does not allow for creative freedom, a clear mix will allow you to make the best possible decisions you can for dynamics, sound choices, and so on. All because you can clearly hear what everyone is doing.
This is one of the reasons I save my more expensive in-ears (nothing fancy, Shure SE535s) for session work when I want to make sure I can hear absolutely everything I’m doing to ensure I’m totally immersed in the recording session and making good choices for the song.

That being said, IEMs aren’t for everyone!
I’m aware that there are a few situations where it’s best to go with traditional monitoring options (like wedges):
In rare cases, some people get itches or even rashes when using them for prolonged periods of time (eg. a gig or a rehearsal). This has become increasingly less common with modern sleeves/earmold materials, but it is still something you should keep in mind before you go and spend $500-$1000 for your ticket into the IEM world. I’m one of those people. But eventually, I found the best sleeves and products to get me going, and I have not experienced any symptoms even when wearing them for several hours every day.
In other cases, some people (two artists I worked with, for example) would become dizzy/seasick, or get headaches, feelings of loss of balance, etc. This can be caused by a pressure differential that can occur between your inner/outer ear, or simply because the sound isolation can be too intense and everything sounds muffled and distant.
Humans developed their ears as a fight or flight system. The outer part of the ear – the pinna – works as an incredibly sophisticated radar system. Humans can tell with astonishing accuracy where a sound comes from. It is the same mechanism that would give you an early warning if you were about to get eaten by a saber-toothed tiger. Although, for the last 100 years or so, it was probably only used to avoid being run over by a horse, or in the last 10 years by a car (while we cross the street looking at Instagram). Our ever alert brain can hear the car honking at you (or a saber-toothed tiger’s stomach growling) and will shift hormones in your body or inject adrenaline to make us run faster, see better, etc.
Let’s back up for a bit and talk live sound reinforcement history. Why is there a big demand for IEMs in modern shows and performances?
Looking back at ‘90s AA and even AAA stages all around the world, you would expect to see a monitor engineer hanging out on the side of the stage or under the stage, in the dark, crafting 4-16 different mixes at the same time.
A typical example of the mixes they’d be crafting would be:
Now, here’s the problem. Imagine you are standing in the middle of the stage. Every sound around you is getting picked up by virtually each of the microphones on stage. The singer’s microphone is capturing the cymbals, the guitar amps, the big band brass section. Your drum overheads are picking the guitarist’s amps, the keyboards that are coming out too loud on every wedge, and even the bassist’s amp!
And if that wasn’t enough, now every microphone on stage will also be picking up everything being blasted by the side fills, the drum fill, the singer’s wedges, the keyboardist’s wedge, and so on.
See the problem? Not good!
During a typical gig, as the musician’s ears become fatigued and TTS (Temporary Threshold Shift) creeps in, every single musician is going to ask for the vocals to be louder. As a result, someone will then ask for the guitar to be louder, then the kick, then the snare, then the keyboards, then the vocals again…ooof!
Now, I’m not going to cover techniques to properly manage monitor mixes as a monitor mixing engineer, as that’s totally off-topic. But I’ll let you know that some of the most interesting techniques involve a level of placebo effect tricks that can be used.
Hey I just met you and this is crazy, but here’s another solution for the problem: use IEMs maybe?
Let us give each member of the band a set of in-ears. Now everyone can have their custom mix and we can:
The end result: your stage is now much much quieter.
We can even move the guitar and bass amps off the stage and put a microphone on them. It’s not uncommon to place them under or behind the stage as this will reduce the amount of noise and spill.
Your ears will thank you, your FOH and monitor engineer will have an easier time mixing the show, and the audience will have a better sound experience.
Some of you might be saying, “So what – I don’t play for 5000-person crowds. Who cares?” Others might be saying that the venue you play at doesn’t pay much and you are on a budget. And then there’s the quiet guy in the back – yeah, you, the one in the red shirt – who says “I just play for fun in my basement.” Well, keep reading.
Here are a few other reasons why an IEM setup is such a great little resource.
For the same reasons mentioned in the previous point, because there are fewer speakers on stage amplifying the same sounds the microphones are picking up, there is less chance of feedback occurring.
Audio feedback – also known as the Larsen Effect – is when microphones and speakers get stuck in an amplification loop. The microphone captures a sound, any sound, and is amplified by your massive speaker wedges. If the microphone happens to capture the recently amplified sound again, a chain reaction of endless amplification occurs: the microphone is now capturing the same sound (but much louder), and sending an even louder version of that to the speaker to be amplified further, which will cause the microphone to pick up the same sound amplified even more, again and again. The result is a very quick build up of a shrill, piercing sound.
But when the entire band is using in-ears, the gain before feedback is so much higher than normal that the engineers can consider using condenser microphones on stage or even preamps with a lot more gain. This can make your nice drum kit sound better, and allow your vocalist to sing without straining – saving his or her voice for longer.
I have experienced feedback through in-ears. Once. In the studio. The words that came out of my mouth would probably make this an R-rated post, but suffice it to say it was not pleasant. In fact, it was painful.
How did that even happen, you ask?
The vocalist, bless him, in his sound booth, decided that the really expensive and super sensitive microphone was a perfect place to hang his headphones. The microphone picked up the thud of the door closing, went through the console and headphone amplifiers back to the headphones that were resting right on top of this super-sensitive microphone. This amplified that thud again…and again…and again…until the rest of us musicians were ripping the IEMs out of our ears and howling at the moon.
Yeah, backing tracks!
In the ‘00s, pretty much every band was beginning to play with backing tracks. Even smaller gigs would have synchronized sound effects, synchronized lights, or even synchronized effects changes for the guitars.
I cannot tell you how much of an amazing thing it is to have the guitar effects being changed via MIDI from a DAW. It’s a blessing! No more cables and wires all over, and huge pedalboards taking up valuable space on a small club’s stage. And you don’t even have to ‘tap dance’ or remember to stand by your pedalboard all night. It’s truly an amazing thing!
This means playing with a click and sometimes even guide vocals (like “Drum solo in 3, 4!” or “Dave, don’t forget to stop playing in 2 bars”).
Wouldn’t it be funny if you went to see Radiohead’s show, and you could hear faintly, in the background, the familiar sound of a metronome blasting through side fills and wedges into the microphones and straight toward the audience?
“I’m a creep…*BIP* *BOOP* *BOOP* *BOOP*”
Yeah, no!
Instead, you and your band should use IEMs.
The monitor engineer will feed the metronome to the band members who need/want it. The stage is quieter, the mix in your ears is cleaner, and the fact that you can hear yourself and your colleagues better should reduce your cognitive overhead and allow you to have fun playing your show.
Oh, and the audience is none the wiser that you are playing to a click or listening to the MD’s directions.
I hear you, Rachel, third row at the back! “I don’t care! We play punk rock at our local club and honestly, we and our fans just want to rock out. We don’t need no metronome.”
I completely understand.
That’s why I saved the best for last:
Remember the next day after those gigs, where the ringing in your ears and hangover are unbearable? IEMs can help you avoid at least one of those symptoms (the ringing, at least).
IEMs can reduce the outside noise level by anywhere from 20-30dB, which is considerable. This level of reduction alone helps you hear things more clearly. They can also improve comfort over conventional rubber earplugs, with the added bonus of being able to get “more me” in your ears to make your performance as comfortable as you want!
To reiterate, even if you don’t have anything being fed through in-ears, reducing the noise level by 20-30dB can make it much easier to hear everything that is going on, saving your ears and making it easier to play with your bandmates.
Lastly, they look cool. Or they can, anyway!
You can customize drawings or colors in them. Just have a look at Adam Tuminaro’s IEMs made by CTM:

If you still are not interested or curious after reading this far, maybe an IEM setup is indeed not the best tool for you. And that’s okay! We are all in this for the music, regardless of how we choose to play.
As much sound engineering is a discipline backed by physics and complex mathematics, its real-life application is based on compromises.
Choosing IEMs over traditional wedges for your band is usually a compromise between:
And the list goes on.
“I’m sold! I want a pair! Where do I start?”
Before you go ahead and spend your hard-earned money, there are a few things I’d like you to consider when browsing for your shiny new pair of IEMs.
My hope is that this section will help you save money in the long run, minimize headaches, and avoid getting swayed into buying something due to misleading advertisements.
João’s Rule #1: If you’ve never used IEMs before, do not buy a high-end model.
The reason for this wild claim of mine is that most high-end models and boutique brands only offer a custom in-ear system where the earmold is part of the package. Custom earmolds are expensive and the mold-making procedure is not a very comfortable one.
So unless you are certain that:
…then do not spend the money.
You’d be making a number of presumptuous choices where you don’t yet know your personal preferences. For example, how many drivers do you want? Sizes? Weight? Sound quality? How much sound isolation do you need? Do you know if you’re allergic to a particular in-ear material? Which material should you use? Should you make the earmold with your mouth open or closed? Do you have another problem that prevents you from using IEMs?
If none of the above deterred you from jumping straight into a pair of Ultimate Ears, I’ll just mention that you could buy a whole set of mid-range cymbals for the price of one high-end IEM pair. Or a couple of those really nice Sabian Artisans you’ve been looking at. Or that amazing VK snare that you know you just have to own.
TL;DR: I suggest you get the Shure SE215 (in Europe, shop here).
If you know you like earbuds and earplugs, and sound quality is important to you, and you are able to afford something more expensive, consider the SE425 (buy in Europe).
There. You can skip the rest of this section if you don’t have an interest in the technical details.
If you do want to understand what you are buying and why maybe it’s time you get a refill on the tea/coffee/other beverage I suggested you sit down with earlier.
There are a few reasons why I strongly recommend Shure IEMs:

Regardless of what brand you choose, you should consider the following:

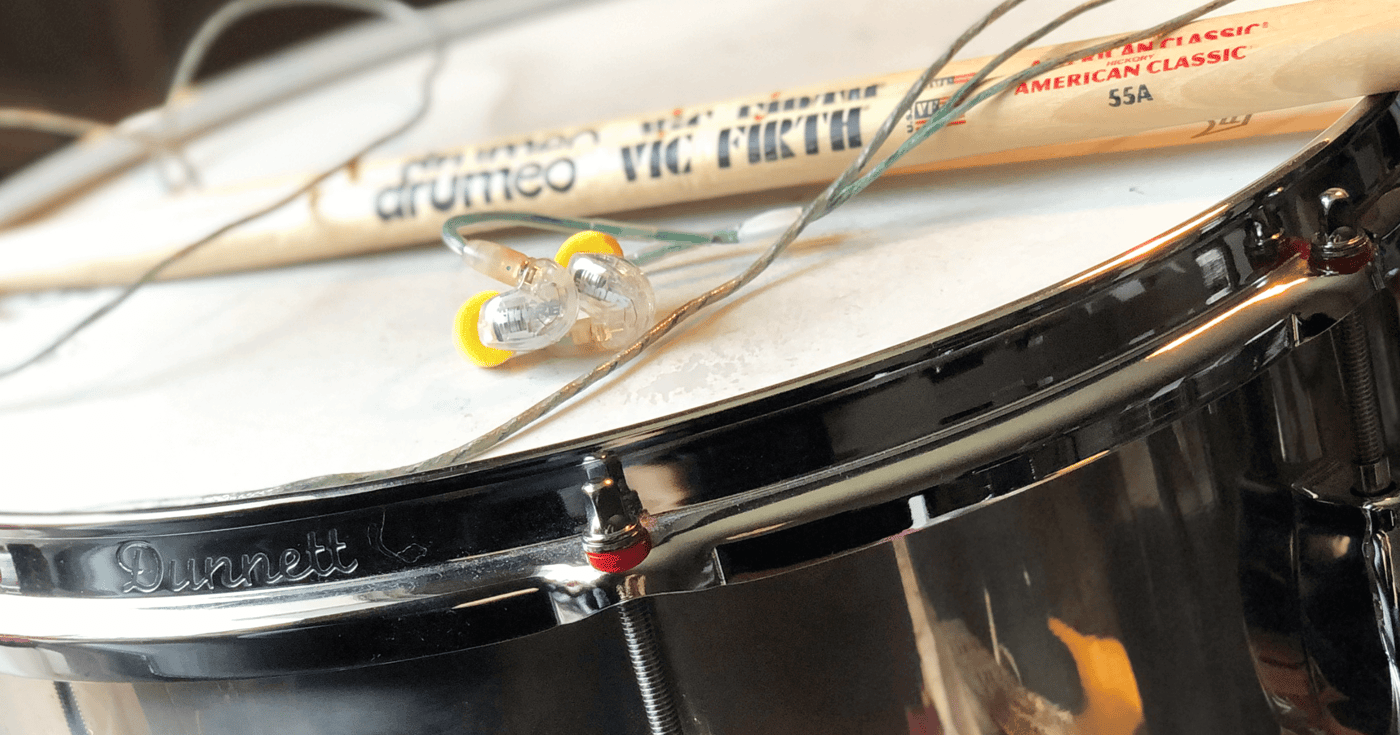
Also, ensure the model you pick allows you to try a variety of different earbud sleeves, especially:

The earbuds in the photo above are all available for the Shure models at $10-15 a bag. This is considerably cheaper than doing a silicone custom earmold and will allow you to figure out what kind of material you like best.
If you, like me, are a brave soul who loves getting lost in all the gear that exists out there, here are a few brands for you to consider and get you started on your research.
These brands offer everything from consumer, prosumer, and also viable touring grade options:
The following brands are touring grade/high-end brands, or boutique brands:

Drumeo’s EarDrums have helped over 14,000 drummers protect their ears while still listening to their favorite songs. We took your feedback and made a classic even better!
EarDrums are triple-driver in-ear monitors that seal in the music while reducing external volume by up to -29dB. With this latest version, you also get better connections, extra cable, a miniature road case, and the all-new triple black color!
Pick up a pair and make sure you hear it all for years to come.
If you are a touring drummer, the number of drivers is probably less important to you. This is because you probably won’t need to rely on your IEMs for the low end. If you’re playing bigger venues, you’re more likely to have a drum fill speaker, or you might have invested in a Porter & Davies style throne or a Throne Thumper/Butt Kicker (a heavy piece of metal that you attach to the underside of your throne that rumbles when the bass plays or the kick drum is hit so you can feel it in your upper body).
For the rest of us, drum fills are usually marked as a “nice to have” on tech riders, Porter & Davies thrones are incredibly expensive, and butt kickers are ridiculously heavy. Therefore, if your IEM has a bit more headroom to be able to handle low-end frequencies such as bass, kick drum or synths, you’ll be better off as it won’t steal the clarity from the other instruments. IEMs with more drivers are also less prone to distortion as a separate driver will be handling the low-end frequencies, allowing the driver for the mid/highs to not be overwhelmed and able to perform regardless of how much low end is happening at that moment.
Finally, the increase in the number of drivers has an effect on detail and depth of sound (if you are more of an audiophile) which will translate in a higher-quality listening experience and more immersion when playing.

I need to include a disclaimer before moving forward. This section can be as technical as you want it to be and I need to make it clear that I’m not going to dive into too much detail. There are many ways to present this data and manufacturers use it to try and paint their products as more competitive on paper.
Let’s start by looking at the usual units of measure you’ll find on the spec sheets:
Here are a few best practices that can not only help increase the lifespan of your IEMs, but also ensure your safety, comfort, and best results:
Do not use commercial grade ‘in-ears’ and ‘earbuds’ (like Apple EarPods) for drum practice and stage. They do not offer any sound isolation protection, which means you will actually be exposing yourself to louder SPL (Sound Pressure Levels).
I know Bono looks cool when he does it, but this carries some dangers. Taking one IEM out means that ear will take on the full sound level of the stage. Unfortunately, our brains are weird. Our brains don’t know that you only have one IEM in on purpose. They just get confused and think that both ears got louder and they simply stop being able to listen to anything with the ear that is still covered by the IEM.
The result? You can’t hear your cue mix anymore. This means you can’t hear your metronome and so on, nevermind the fact that your exposed ear is probably incurring permanent ear damage as we speak (poor little hairs on your inner ear snapping in half and dying a horrible death). Your brain will – faster than Usain Bolt – tell your body to signal your monitor engineer to turn the IEMs up. All the way to 11. Now, your protected ear is no longer protected as you are blasting a signal just as loud as the stage straight into your little eardrum.
…two of them if possible, with one on each side of the stage, panned accordingly left and right in your IEMs.
This is because you won’t be able to hear the crowd at all. And it’s a shame to not hear your devout fans and you will miss that chance to interact.
Why stereo? Say you have one microphone set up – you’ll only cover a small percentage of the audience, and then you won’t be able to tell from where the comment came. So you’ll be looking at the audience, looking a bit lost trying to reply to your fan’s comment when they were just to the right of you.
Also, for me, having these microphones helps give some sense of depth and room to the show. If experienced enough, your monitor engineer will know to bring them up/down or duck them during songs so you don’t pick up the venue’s echo (which can throw you off the beat).
Regularly, as in weekly if you are using them constantly. These things are inside your ears, man – why haven’t you cleaned them in years?
Most brands sell wet wipes for IEMs, but a lightly damp microfiber cloth will do. Don’t forget to let them dry outside the boxes, otherwise, mold and bacteria will begin to form if you put them still wet inside their dark boxes. And that also goes for not putting them straight into your ears while they are wet.
There are also these little tools that are designed to scoop up wax that builds up inside the IEMs’ shaft. Keep one at least one of them with your IEMs.

This is as much of a cleanliness thing as it is for isolation. Sleeves (especially the neoprene style ones) will lose elasticity over time and not expand as much as they once used to. This means that over time the IEM will be isolating less and less, potentially exposing you to unsafe sound pressure levels.
As a rule of thumb, I change my neoprene earbuds about 3 times a year, and I use them pretty much daily for one hour or longer.
This will be a preference thing: I can use neoprene plugs for hours, every day, with no itching or rashes, but if I’m about to have my custom medical-grade silicone sleeves in my ears for 2-6 hours, I need to apply something like Audinell (a mix of lubricant and dermo protector (skincare) cream).
Some people claim that this cream is for the care of the earmold. As far as I know, that is not true. The main active ingredient for this cream is Soothex (Indian Frankincense) which is a resin known for its anti-irritant effects.
There are other brands that make similar products. This one works for me. I recommend you try a few until you find one that suits you, especially if you develop irritation/rashes using neoprene, silicone, or foam-based earmold/IEM sleeves.

If you feel like the environments you play in are not super loud and you don’t need to crank up your IEMs, you should consider going for less isolation. Soft silicone sleeves are probably better for you, or – if you prefer a custom IEM mold – make sure you tell the technician doing the imprint that you need low isolation and you prefer to take the imprint with your mouth closed (check out the ‘custom IEM’ section for an explanation).
This will depend on your age, physiology, and earmold brand. You will still be growing and changing well into your adult years. If you did your mold in your early 20s (or younger) you will have to get them redone every few years.
Just keep this in mind and ensure you pay attention to the noise levels when putting them in. If you feel they are letting in too much sound, or you are asking for more level than you usually do (your phone level is a good control for this) then you might consider redoing the mold.
Earmolds also tend to get yellow and stiff with age. When this happens, it’s time to replace them.
There are situations where mono monitoring might be advisable. In some cases, it’s simply a logistic case of not enough AUX sends on the console, and in others it’s to allow artists to use inline “more me” devices that often work in mono.
Another good case for a mono IEM mix is where you know the stage isn’t very loud, and you’ll need an IEM out. You are listening to your playing and your colleagues live, unprotected, or through a low isolation earplug in one ear, and the other ear has the Musical Director (MD), click track, or guide references.
In fact, what you’re hearing in your in-ears shouldn’t even be as loud as your regular stage with just backline or backline and wedges. The idea is that the entire level is brought down to the place your ears hear best (which is around 70-80dB SPL – for more information, look up Equal Loudness Contours and Fletcher-Munson curves). Then the IEMs complement what’s happening with a mix designed to help you hear everything in detail.

Here’s how it’s done:
Get a trained technician (or an audiologist) to do the procedure. It’s perfectly safe in the hands of an expert. Not so much in the hands of your friend who has done it a couple of times.
Some brands of sleeves I recommend are ACS and Sensaphonics. I’ve been using ACS medical grade silicone for years. Both my IEM sleeves and my advanced ear protection are from ACS.
It is worth noting that even medical-grade silicone and the newer hypo-allergenic silicones may still cause discomfort for different people. Your mileage will vary.


Here are a few differences between mouth open/mouth close deep impressions, and how they affect sound isolation:
Isolation headphones use mechanical methods to isolate your sound, usually with dense materials, leather cups, and a fair amount of pressure against the head. These ensure consistent and predictable isolation.
Noise-canceling headphones rely on inverted microphones built into the headphones that are added to your music or cue mix. They rely on the headphone driver’s ability to generate a powerful enough sound wave to cancel out the original noise. They use prediction algorithms to try and adapt to the noise, which explains why you get so many conflicting reviews on their effectiveness.
I advise against using these. The fact that noise-canceling headphones rely on their microphone arrays and the predictive behavior of their algorithms makes them an extremely unreliable ear protection mechanism for musicians, especially drummers.
They excel at blocking continuous, wall-like noises – like sparse office sounds, airplane hums, or constant highway traffic – but they aren’t so good when people start chattering around you, or when you are going for a drum roll.
Also, they offer really poor specs of isolation. A well-known BOSE model does between 20dB of isolation at 50Hz and as low as 15dB of isolation at 500Hz. This amount of reduction is far from being enough for drum practice and stage situations where sound pressure levels of 110dB or more are common. 20dB of noise reduction will still expose you to unsafe levels that can cause long term damage to your ears.
For the long term health of your ears, avoid noise-canceling headphones for music work.
Also, avoid Bluetooth headphones as they have a latency (including Bluetooth 5.0).
If you don’t need dedicated monitoring, you could use just plain ear defenders (like isolation headphones) to bring all the noise down, or achieve monitoring without having something in your ear. For me, the main downside of this is that wearing ear defenders usually means I cannot wear my glasses.
Here are a few options to consider:
If you want some ear protection and the ability to have a quality sound, a hybrid approach of an ear defender on top of your favorite earbud (provided they don’t protrude too much) will probably be more than enough for your needs. The ear defenders can easily do +20dB of isolation, often 29dB and as far as 35dB, and your favorite earbuds will provide you with the awesome backing track for you to play along.
For really high SPL situations, like a very loud band in a small room, you can also use your Shure SE215/425/535/845 under a Vic Firth/Peltor ear defender. This will give you a really high degree of isolation (probably close to 50dB) without the need to go for really expensive, deep imprint, custom earmolds.
For those of you who want to go all-in but don’t like having something in your ears, the GK Music UltraSound is pretty much the Rolls-Royce of ear defender-plus-monitoring that’ll give you high-quality sound for those critical sessions/gigs. They combine 3M Peltor sound isolation and build quality with Sony’s high-end, studio-grade drivers. One of Sony’s legendary models, the 7506, has been an industry standard for longer than I’ve been working on audio. Whether you like them or not, many broadcast corporations around the world, as well as a significant number of respectable audio engineers, rely on the 7506 for their work.
I am not sponsored by Shure or any other brand for in-ears. In fact, I need to reiterate that the IEM way is not always the best way and has as many downsides as it does upsides.
Consider these before putting money and time into an IEM setup:
IEMs, when used correctly, can increase the comfort and increase your playing time without headaches or fatigue, and allow you to listen to your colleagues better. They can also safely protect your ears and help you overcome challenging technical situations such as playing complex music with click tracks or backing vocals.
A lot of the more technical information was presented in an over-simplified and generalistic way, to better suit the intended audience of this post. Also, I need to mention that technology moves fast and new products come to the market almost every day and it’s very possible I’ve missed some amazing key innovation that has revolutionized ear defenders or IEMs. If that’s the case, drop me a line!
decibel (dB) – The relative unit of measurement, logarithmic in nature. On its own, a decibel is meaningless, which is why it’s usually coupled with a reference unit. For the purpose of this article, we mainly use dB as a reference of Sound Pressure Levels (often notated as dB SPL). Common uses of decibels in audio include dBv (volts), dBu, dB FS, dB LUFS, among others.
dB SPL – measures sound pressure relative to the pascal. 0dB SPL equates to 20µPA (20 micro Pascals) which is the auditory threshold for 1kHz. An increase of 10dB SPLequates to roughly double the apparent perceived volume level.
Drum Fill – Similar to a side fill, but intended to be used exclusively by the drummer. A drum fill is typically a regular PA system, in a 2 or even 3-way configuration so that the drum fill has enough power to be heard above a very loud drum kit, and with extensive low-end frequency response. This allows the drummer to easily hear what they’re doing with the bass drum and allow them to lock in with the bass player more easily.
Earmold – Anatomically-shaped devices inserted into the ears for optimum sound conduction and ear protection. They can be produced in most sizes with custom casts and can be made out of a variety of materials, softness or hardness. They often turn yellow and stiff with age and need replacement on a regular basis.
FOH – Front of House. Its use is often overloaded to mean both the sound system and other apparatus that is set up in front of the stage, as well as engineers dedicated to operating such equipment. When someone mentions that they are a Front of House mixer, they are mixing engineers that stay in “front of the stage” during the show, mixing it for the audience. Similarly, the FOH system usually means the sound system array (larger events can have multiple such arrays) that are pointed at the audience.
Frequency – We react to the vibration of air and liquids by turning it into sound. The frequency (or how fast the air-water particles vibrate) defines the content or quality of the sound we hear. The faster the air vibrates, the higher in pitch the sound will be perceived. Conversely, the slower the air vibrates, the lower in pitch the sound will be perceived. We measure these vibrations in Hz.
Hz – Hertz, or units of measurement of frequency. This tells you the number of cycles per second that something happens. In sound, it means how often air varies in pressure. If it’s 1Hz, that means air has changed in pressure once in a second before returning to its resting state. Human ears can detect vibrations in air pressure from 20Hz (the lowest frequency a human can hear) all the way to 20000Hz (highest average frequency a healthy young adult can hear).
IEMs – In-ear monitors are devices that musicians, audio engineers, audiophiles, TV presenters, field journalists, and logistical personnel (security guards, armed forces, police, etc.) use to allow them to hear a personal audio mix for better clarity or to hear directions from Musical Directors, Producers, etc.
Impedance – This is the combination of resistance and reactance to a circuit or component handling alternating current. All analog audio signals are, in fact, alternating current signals, and impedance is an essential unit of measure as it takes into effect frequency content.
MD – The Musical Director is the person in charge of all aspects of a musical performance or production. Traditionally, he or she would be the chief conductor of an orchestra or concert band, but they are also responsible for supervising arrangements and personnel during recordings and performances. It’s not uncommon if something goes wrong on high profile shows, the MD can give direction to the stage performances on how to react and change to any given event.
Neoprene – Also known as PC rubber, this material is extremely flexible and retains elasticity for a long time and at a variety of humidity and temperature ranges. Some people are allergic to it and can develop dermatitis from it or any of the chemicals used in its production.
SAE – School of Audio Engineering is a private college with campuses and facilities all over the globe. As of 2013 it’s known as SAE Institute and accredited by Middlesex University for BA and BSc programs. It has also been accredited by the Quality Assurance Agency for Higher Education (QAA).
Side Fill – Side Fills are usually made up of a regular PA system designed for small crowds. These are full-range, incredibly powerful Public Address systems that are installed on either side of the stage to provide even coverage with a mix similar to the one an audience would have.
SPL – Sound Pressure Level, or acoustic pressure, is the deviation in atmospheric pressure caused by sound waves. In short, it’s measured in dB SPL with reference to Pascals, meaning that 0dB SPL is the same as 20µPA – the quietest sound our ears can hear. Notable points on the dB SPL scale are:
TTS – Temporary Threshold Shifts are temporary shifts in the auditory threshold that can occur suddenly after being exposed to loud noises. Our ears will change their configuration and will perceive sounds as being quieter, “shifting” our perception of loudness down. This shift can become permanent if sufficient recovery time is not allowed. People doing strenuous work or exposed to heat are more susceptible to experience short or long term TTS.
Wedges – Common road term used to specify floor monitors (speakers) used by musicians who play standing or sitting down. They are designed to be placed on the floor of the stage, and their wedge-like shape allows sound to be directed roughly at ear height for a musician standing on stage.
*This article contains affiliate links, which means we might earn a small commission from the product seller if you make a purchase. For more info, check out our privacy page.
João Lebre is a freelance mixing engineer at caffeinatedaudio.co.uk and drummer based out of London, UK. He has toured as drummer and FOH engineer, designed and commissioned world class studio installations, and lectured a range of audio engineering topics for SAE London. João is a passionate music instructor and is truly obsessed with gear.

By signing up you’ll also receive our ongoing free lessons and special offers. Don’t worry, we value your privacy and you can unsubscribe at any time.